


My Process: How an Artist Can Make Custom Products with Lasers
Are my products really handmade if I use machines?
How do you define a “handmade product?” Does it bring up images of a person making something utterly spectacular from a big ol’ blob of nothing — a ceramic artist expertly forming a bowl from a slab of clay, for instance?
Lasers are super cool, and they have only expanded my art-making process!
It did for me. I was convinced that “handmade” stuff came directly from a person’s skillful yet dirty hands, using the most primitive of tools, starting with the most basic materials — essentially making beauty out of a mess. That’s why it took me a long time to define my current technical process as handmade, because I use shiny, clean things like an iPad or fancy, expensive machines. It seemed too fake because I wasn’t elbows-deep in the messy process.
After a ton of inner work clarifying the products I *want* to make, I finally landed on my personal artistic process, involving lasers! ⚡️ Here I explain my process for those of you who asked (there’s a lot of you), but beyond the technical steps, it really boils down to intentionally crafting a product that I love, which to me is the heart of “handmade” products anyway.
My Process, Explained
For those of you who just want the gist, I’ve made this handy-dandy visual guide of the steps to my process! ⬇️
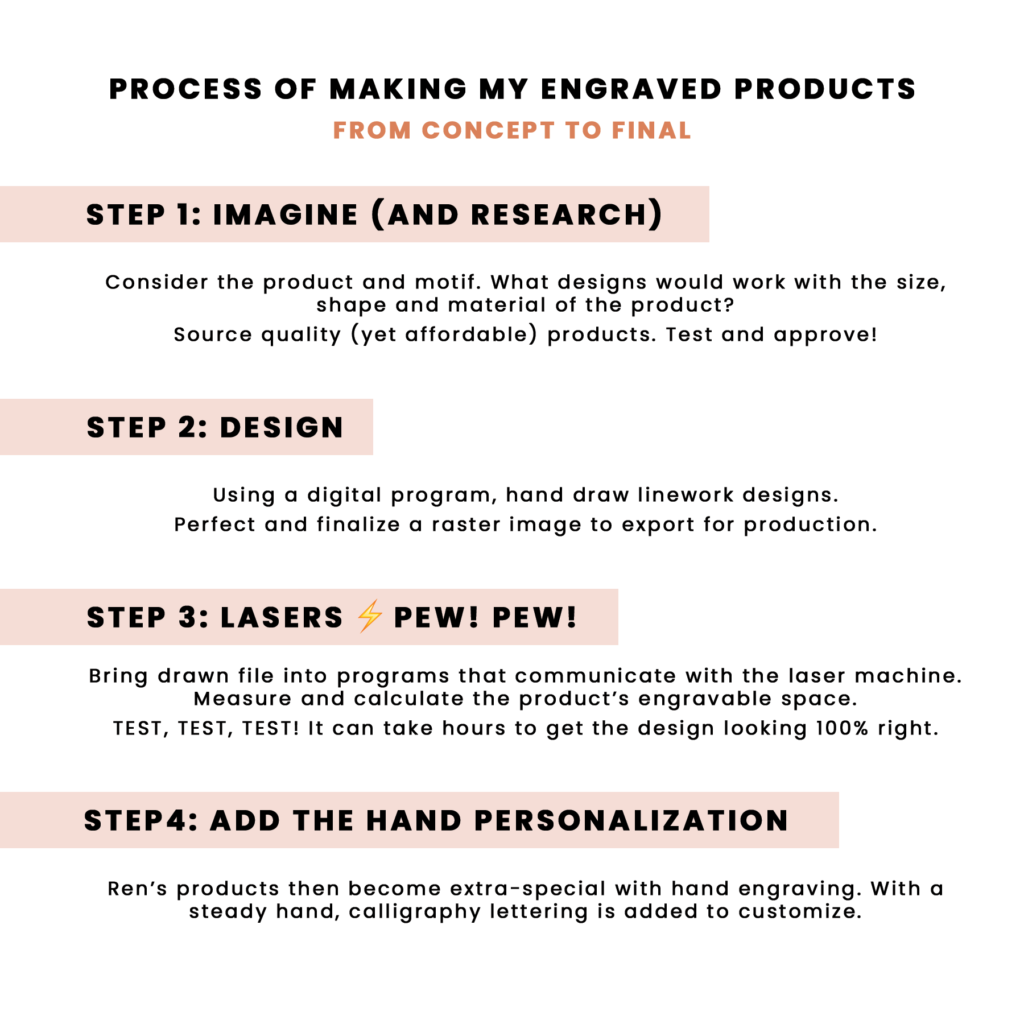
STEP ONE, IMAGINE (AND RESEARCH) 🤔
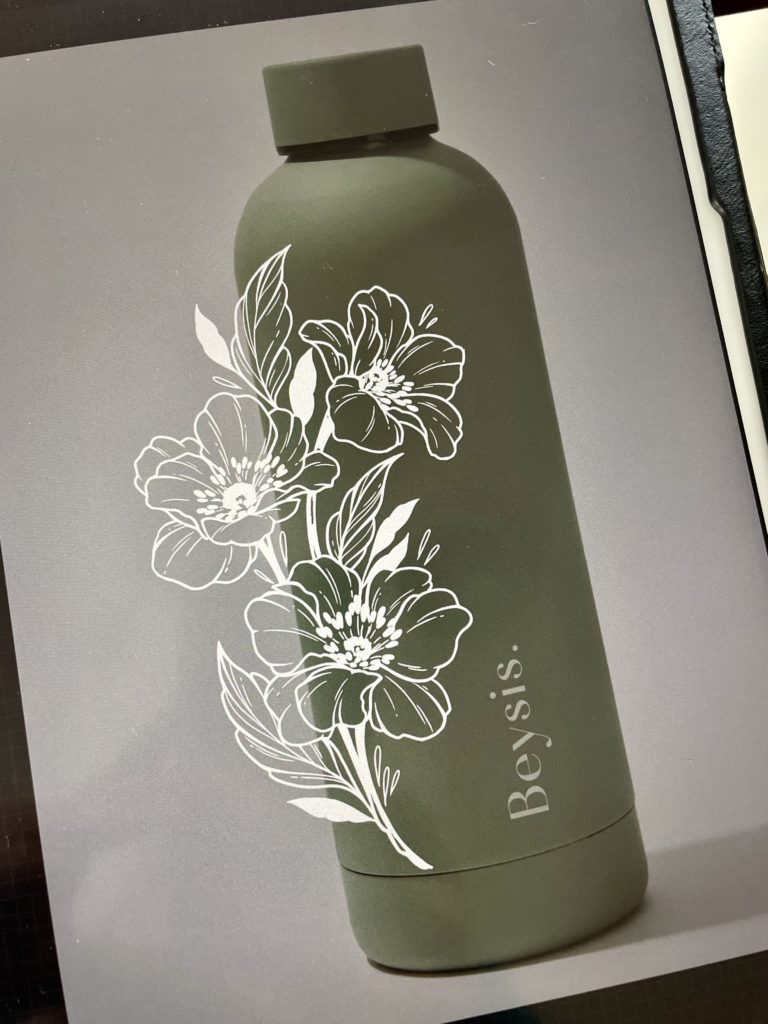
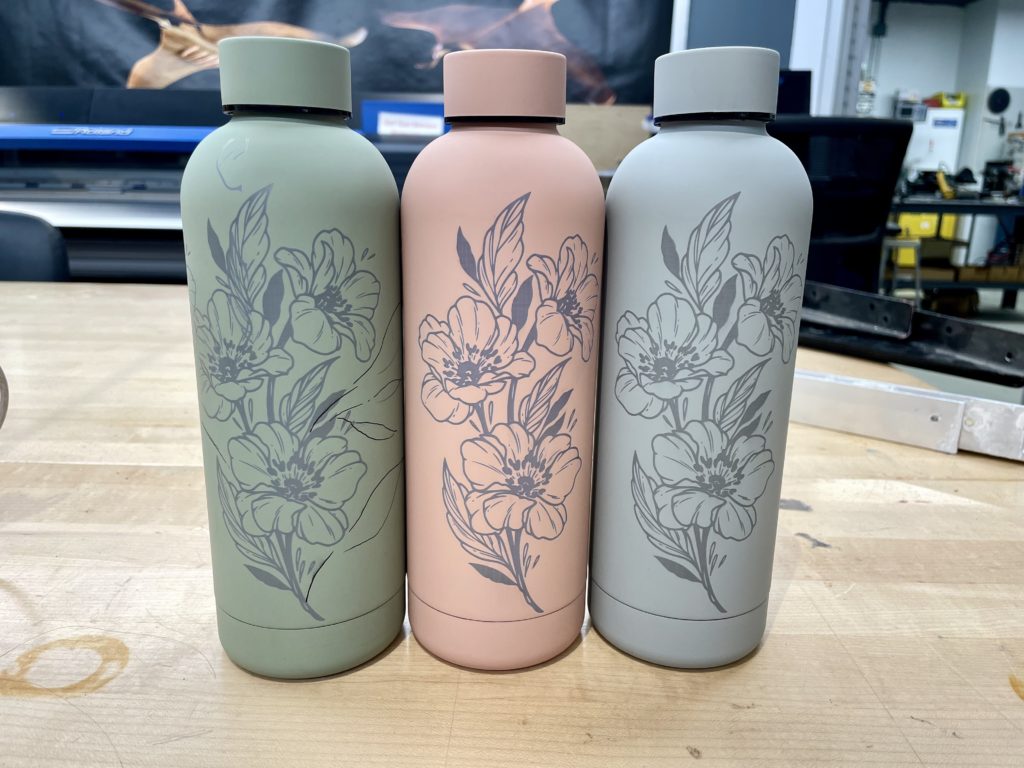
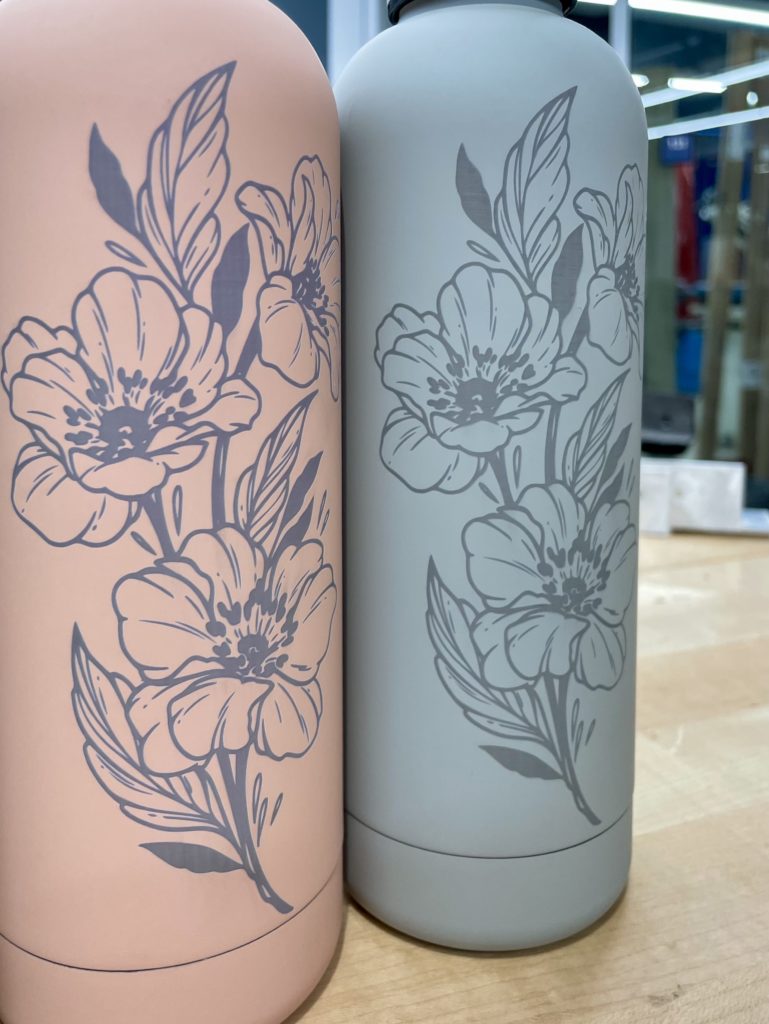
I begin by considering what product I’d like to make, and imagining a motif that would work nicely on the surface. I consider the size, shape of the form, and the way the item is used. The objects I choose to work with are all items I’d like to own myself. Usually I’m drawn to simple and classic objects, something with clean lines to compliment (yet not overtake) the intricate decorative designs I plan to adorn it with. I enjoy the contrast this creates — a delicate piece of art in an unexpected and ordinary place!
Research is involved in gathering the objects. Not only must it engrave nicely, it also needs to be QUALITY. I take the time to test the object in my daily life. Ren tested and approved!
Mostly I source products from dependable companies like Libbey and S’well (I love their missions and the fact that they receive high customer ratings for quality) or source materials from trusted Etsy sellers (for instance, my metals come from Central Supply Inc in California).
STEP TWO, DESIGN 📐
Armed with the trifecta of digital tools — the iPad Pro, Apple Pencil and drawing app Procreate — I consider the shape, curves and size of the physical product I’ve chosen, which can be challenging to envision when I’m drawing on a two-dimensional surface.
As an artist, I see things in lines. I’m usually one to notice teeny tiny details in general, so my work seems to portray a maximalist approach, often with intense linework that I like to imagine dancing around the surface. My intent is to create a feeling of delicate movement on a static, seemingly ordinary object.
So, to explain my process in a more technical way — I draw my linework within Procreate, and when it’s complete, I export a raster image of the design for my product. With this hand-drawn yet digital file, I’m now able to move to the production stage in my process.
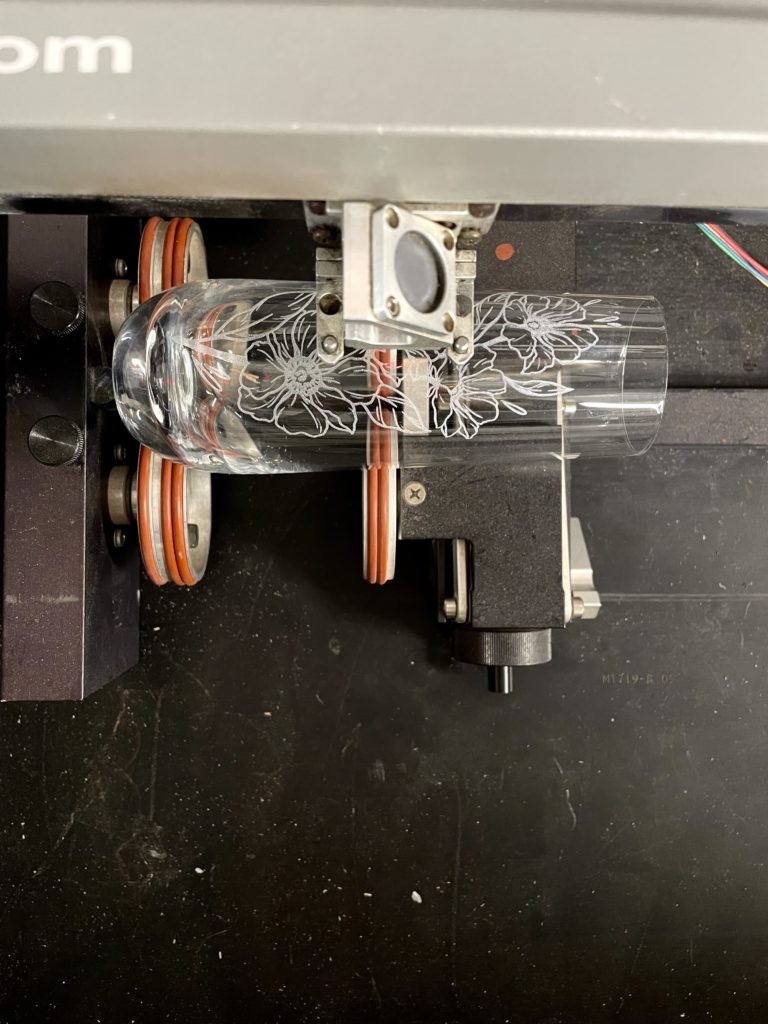
STEP THREE, LASERS ⚡️ PEW! PEW!
Once my design passes my perfectionist standard (sometimes I am admittedly too obsessive), I am then ready to visit my local maker space, called The Fab Lab. It’s here that I am able to use a variety of tools and machines to make basically ANYTHING under the sun. It’s my nerdy happy place!
In the Lab, I briefly use a program called CorelDraw to set up my canvas and file, which will in turn “speak” to the laser machines. It’s here that I use math (ugh) to calculate the space the design will occupy on the item.
From there, CorelDraw communicates to the laser machine, which is specifically formatted for the material I happen to be working with (glass, metal, wood, etc). The industrial lasers I use are Trotec and Epilog, which are extremely powerful machines that can intricately cut and engrave complex designs.
These machines are not for the faint of heart! Though it seems a machine would do all the heavy lifting, I’ve spent many hours learning, testing, FAILING — until I finally produce something I’m proud of. But though the process of using laser machines takes dedication, the reward is great when designs can consistently be produced on a larger level. As my kids would say — SO SATISFYING!
Check out my design being laser etched onto a wooden cheese board! ⬇️
STEP FOUR, ADD THE PERSONALIZATION (BY HAND) ✍️
Some of my products then move on to get the extra-special magic Ren touch of calligraphy personalization! If the customer chooses to add a name or phrase to their item (which I highly recommend, lol), the process becomes even more “handmade.”
Using a hand engraving drill, I am then able to etch directly on the surface of the product to add the lettering. The question I get often is, “is that free-hand?” — which to that I respond, “yep!” With a steady hand, I harness the power of the drill to carefully draw the script lettering in my signature style.
Check out my live engraving offerings, where I set up my engraving space on-site to personalize items for event guests or customers!
If I’m being honest, this is my favorite part, but it does take a toll on my hand. The drill itself is brushless, which means it has very little vibration, but the pressure and intensity of my grip has been known to cause me pain. It’s for this very reason that I no longer do all my designs by hand and utilize the lasers.
Here is my hand engraving (sped up for viewing) in which I added a name to a stemless wine glass! ⬇️
Assumptions about Digital Tools
Every so often, I sense that customers assume machines make things easy. They probably imagine me clicking some things and pressing a button and BAM! the item comes out looking shiny and ready for purchasing! I must be making BANK on something I’ve designed only once!
I get that. In fact, that could be what I was feeling initially when I worried my process wasn’t “messy” enough. The reality is that machines have a huge learning curve, and it’s completely overwhelming at first, or whenever you’re trying a new design or product surface. Just because a computer or laser is doing the grunt-work and physically etching the tool doesn’t mean there isn’t a human behind it (sometimes pulling out their hair in frustration).
That being said, it’s totally and completely possible for artists to harness the power of machines!
Advice for Artists who want to try Lasers
Beyond customer questions, I also get a ton of questions from artists and makers who see what I do and wonder if their drawings or designs can also be crafted into products. My answer is, YOU CAN DO IT TOO!
Yes, lasers are expensive, and I don’t recommend purchasing one before you’ve done your research. I personally don’t own a laser (maybe in my future?), but I do invest in a monthly membership at my makers space that is run by our local community college. I’ve heard some people have available lasers in their community libraries or colleges, or there may even be an independently-owned studio that allows access.
Before you begin with lasers (or really any machine), please understand there is a major learning curve. The best investment you can make (time and money) is to get trained by a knowledgeable professional in order to fully understand the capacity of your machine. Safety is also key, especially since they are technically dangerous and can start a fire or injure the user.
If you are getting trained in the tool (for me, that meant a session or two with a lab tech at my maker space), I’ve found it’s best to have a very SPECIFIC project in mind, with your materials purchased ahead of time for testing. Creating sketches are also helpful in order to visualize the project at hand, and they let your instructor see exactly what you are planning so they may best guide you. If you can find a physical item that is similar to what you’re trying to emulate, that can really help with testing, as it provides a visual to compare quality with what you’re creating.
Beyond lasers, there are also incredible machines that I haven’t even begun to dive into myself — thermal printers, embroidery machines, 3-D printers, and CNC routers to cut large wood projects are some of the items on my list that I wish to harness down the road. Truly, once you start, it’s hard to stop imagining the possibilities!
Ultimately, I believe that really anyone is capable of harnessing tools, and nothing is beyond someone’s comprehension — as long as the person puts in the time, energy, and practice to learn. You are smart enough to use fancy-schmancy machines and nerdy computer stuff! I sometimes have to remind myself of this. It’s the patience and inner drive that is required to break through to the other side — the one in which you pick up your newly crafted product and smile!
Final thoughts
And so, as I continue down this somewhat hybrid path of creating “handmade” items, I often find I have to do a check-in with myself. Even though I can potentially create anything with machines, I have to ask — Is it something I love? Is it something I think will be useful and enhance a person’s life? Is it something I’d buy myself? Is it something that feels like it’s truly made BY ME, with my HEART and SOUL poured into it?
Okay, that last part may be a bit much, but I can honestly say my current product line is something I’m deeply proud of. No matter what a customer purchases, they’re getting a little piece of Ren in every item. “Intentional crafting” is maybe what I should call it — now, that sounds even better than “handmade” if you ask me. 😉


