


Real Client Project: Custom Hand Engraving on Steel Water Bottles
Ren’s actual process for Personalized Engraving from Start to Finish
My Personal Story with Hand Engraving 🙋♀️
When the COVID-19 pandemic hit the US in 2020, our country was met with complete slam of the brakes. Like many others, my business took a huge hit as my client projects came to a halt and my scheduled workshops evaporated. I was left with a complete empty space with the pandemic shutdown.
A month prior to the shutdown, I had purchased engraving tools and a Calligraphy Engraving course, with plans to eventually learn the technique and add it to my offerings. It looked like fate had decided what my focus would be during a long quarantine period and tumultuous time afterwards. The only thing that made sense (and brought me a bit of joy) was to pour my energy into learning Hand Engraving.
Many have a similar story of finding a new passion that got them through the struggles of 2020. I luckily was able to hone my skills of Hand Engraved Calligraphy, falling in love with the process and the delicate lines etched on glass and metal. Once I started sharing my new techniques, I felt a real shift as customers started knocking at my door for custom Hand Engraved items, a real surprise outcome of an extremely taxing time!
Hand Engraved Offerings for Clients ✍️
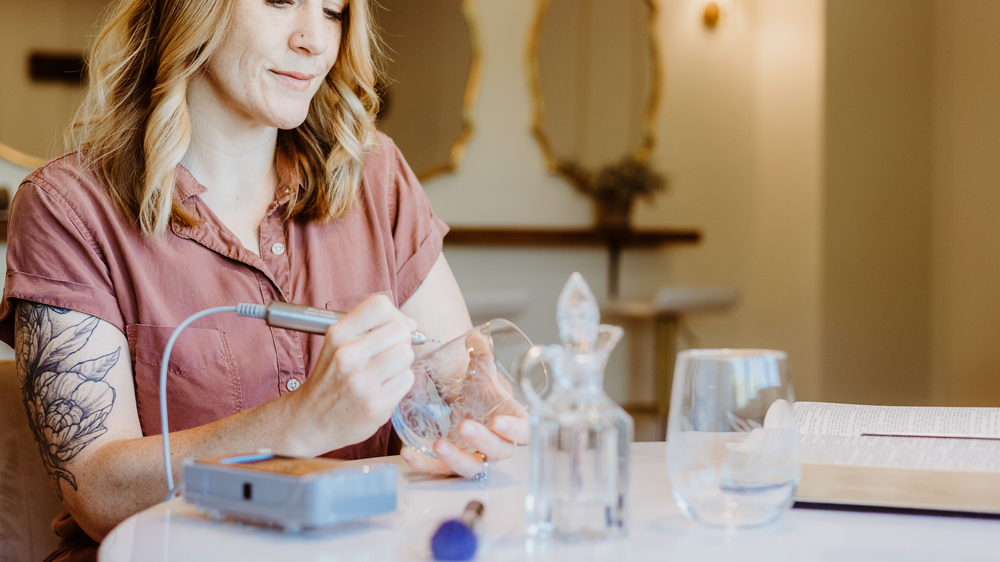
While I do run an online shop that sells my original designs on products, some select items also have the ability to be personalized with a name or short message — for that I use Hand Engraved Calligraphy. With a specialty hand-held rotary tool, much like a dentist’s fine drill, I carefully freehand etch the curvy letterforms with the tiny diamond bur. It’s a process that takes a lot of careful concentration and a steady hand, but I’ve trained myself and my confidence!
But on occasion, a customer reaches out, hoping to have another design created that is more personal to them and I don’t carry online in my shop. One example of this is when a wedding client is looking to have hand etched florals on a glass, inspired by the blooms on their invitation or bouquet. I’m always happy to hear what the project entails and talk it through to see if I’m the right girl for the job!
Currently, I do take on custom Hand Engraving projects for clients who reach out with a specific request. These projects take a lot of coordination and communication as compared to a direct sale online, but as long as the customer is willing to have a longer turnover timeline, I am able to craft a unique product with Hand Engraved Calligraphy and designs. Over the years I’ve learned how to best coordinate a custom project, and I’m happy to show my process so others can understand all it takes.
This blog article was written for Artists looking to see the steps of a custom design from start to finish, as well as people interested knowing more about the process of Hand Engraving a real order, as it’s sprinkled with many tips and tricks.
Potential customers who may be curious about the craft behind my process may be interested in reading about this case study — I get a lot of questions on how I handle custom orders from a customer’s perspective, so I decided it was best to show you a real-life example!
The Project: Custom Names & Leaves on Stainless Steel Bottles 💦
🌿 Beginning Coordination of Project
Normally when a client is requesting a specialty order that isn’t available in my shop, they reaching out over email, through my website contact form, or through social media. The conversation usually begins with them asking about a specific image or word they’d like to engrave, or perhaps they have a specific item they’d like to purchase and have me custom etch upon.
With my experience, it’s best to have the client specifically answer these questions before I give them a final quote:
- What object do you wish to have engraved?
- Have you purchased the object, or do you need to order it online and have it shipped to me?
- What word(s) EXACTLY would you like hand engraved? Correct spelling, grammar and capitalization is important!
- Do you want to add an illustrative element or image? (This will increase the price)
- What is your timeline? What day exactly do you wish to have the order in-hand?
- Do you live locally for free pickup?
- If not local pickup, will I be shipping the item to you, or the intended gift recipient?
These are super important questions to get the ball rolling. I find that the best clients are the ones who can easily communicate these answers! Once you have an idea of the scope of the project, it’s easy to invoice the client — my pricing is based generally on how complicated the design is, what surface I’m engraving on (some are more difficult than others), and how quick the turnaround time is.
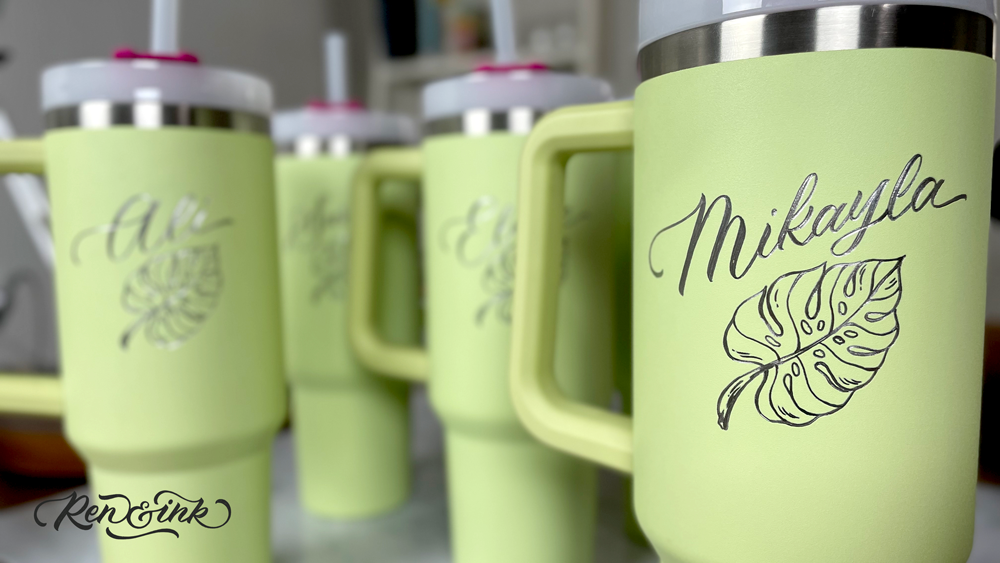
In this actual project I coordinated, the client requested a fleet of large 40 oz. Stanley stainless steel tumblers, and she wanted them personalized for their colleagues’ special holiday gifts. She had pre-purchased the items herself, and handed them off to me, as she lived locally.

The 40 oz. Stanley tumblers were huge! They are probably the biggest stainless steel item I’ve engraved to date, but that meant they had a beautiful space on the opposite side of the logo for a large design. The unique color was also exciting to me to see how the silver etching would look.
This particular client is very familiar with my work and requested a botanical design that she knows I can execute, but it also happens to have significance to her independent business and staff. One of my favorite parts about creating custom designs is having the honor of making something that has true meaning for my clients! It fills me with joy that this item is not only one-of-a-kind, it has a special story and meaningful reason for being created. All the good feels!
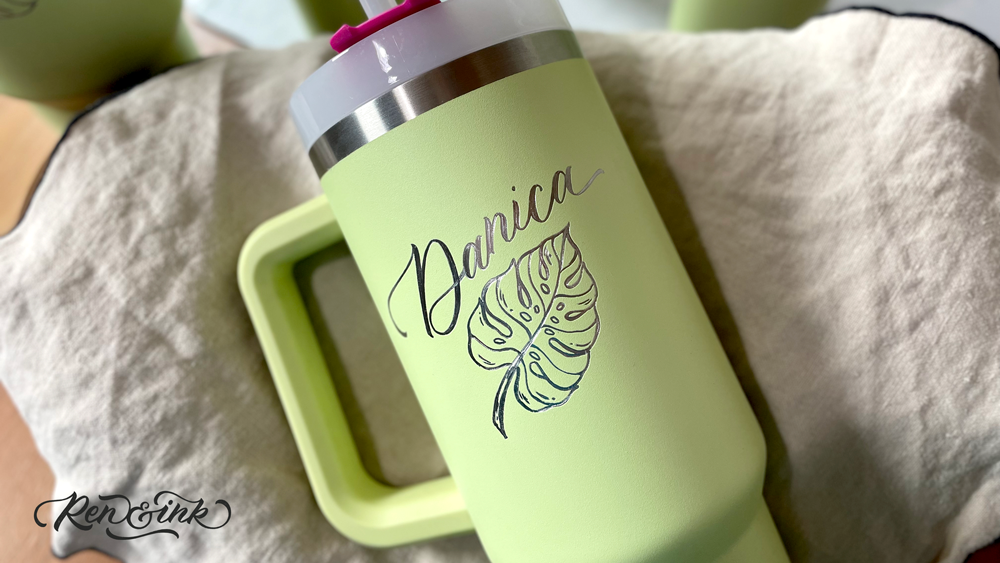
The client requested Hand Engraved Calligraphy of names or a first initial monogram (she wasn’t sure and wanted my opinion), with the addition of a single tropical monstera leaf. I absolutely felt confident in this design — once we agreed on pricing and timeline, and I invoiced the client for the full amount, we were both excited to move forward.
It helped that the client purchased these bottles ahead of time so she could get exactly the size and color they wanted, and I could get started quickly on the design and etching portion. Most of the time a client won’t have the specific product yet — I’ve found the best way to handle this is to have the client purchase the item and have it shipped straight to my home studio. This is the most efficient way to have the item delivered quickly and cut down on back-and-forth exchanges.
🌿 Sketched Mockup & Client Approval
Once I had the Stanley tumblers in hand, the next step was to create a mockup design of what the client requested. This is a special step that I always ALWAYS do for my clients with custom requests! It helps them feel confident that they can view a sketch of the design ahead of time, catching any possible errors or miscommunications before it’s permanent — also it’s just kind of a cool personal touch that gets them excited for the final design!
For this specific project, I snapped photos of the Stanley bottle straight-on with my iPhone. I then sent them onto my iPad, and with the Apple Pencil, I was able to draw a couple sketches of my vision.
Technically speaking, I imported the photo into my favorite drawing app Procreate, and then added layers overtop. I sketched my design with a gray color to mimic the look of the etched lines, as they will be a shiny silver stainless steel. By using this method, I was able to resize the layers and “place” the leaf and Lettering digitally for the client to view my ideas. It was so easy and efficient to do this all digitally, and I highly recommend it!
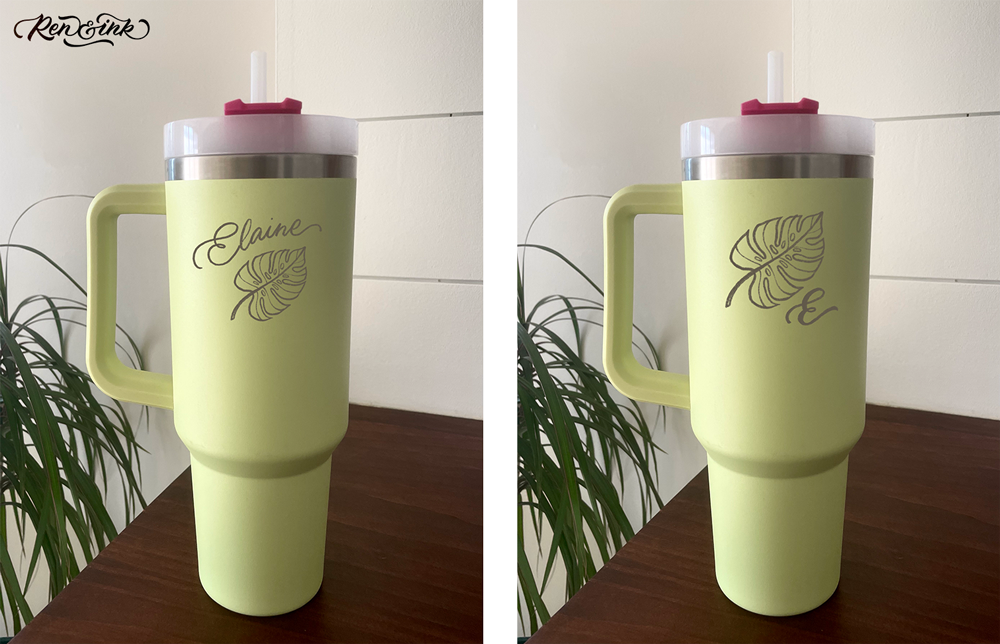
I ended up sending her two options as she requested. We both agreed that the one with the full name over the monstera leaf was the clear winner!
Once the client approved the sketch and gave me a resounding, “it’s perfect!” — I was then ready to move on to the production stage, which is certainly the most labor intensive part of the process.
🌿 Sketching & Transferring Art
Now that I was feeling confident that the client was happy with the direction and overall look of the design, I must use my digitally drawn design from the iPad and transfer it onto the Stanley tumblers to Hand Engrave. Also, each Stanley was meant to have a consistent monstera leaf on each — though each is handmade and won’t be an exact duplicate, I’m trying to draw them as similarly as possible.
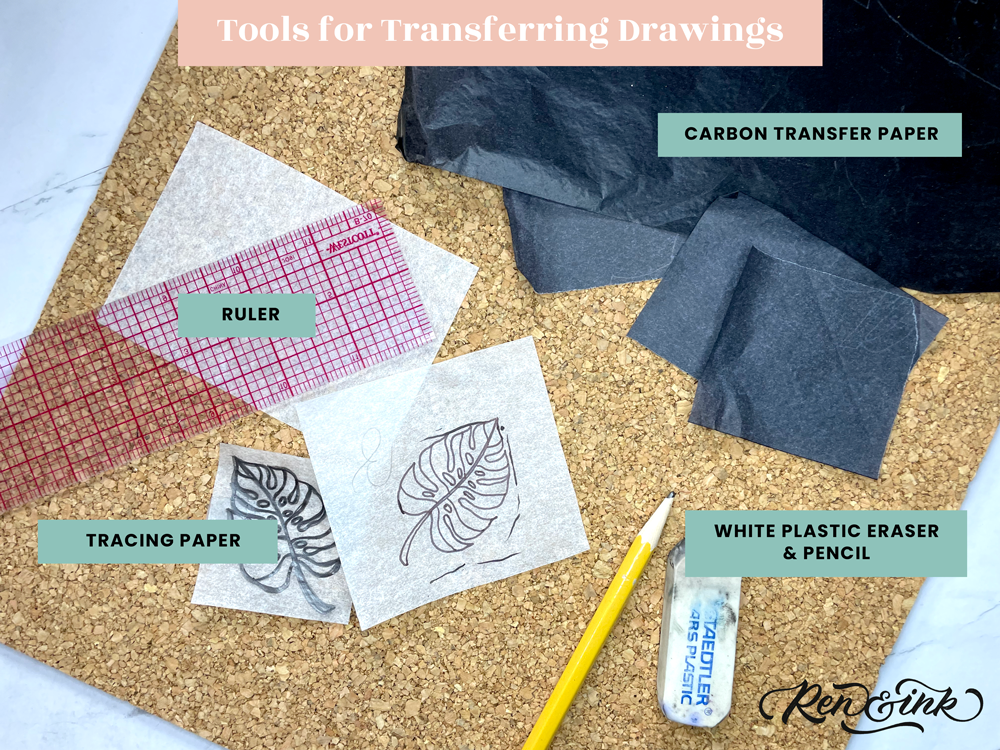
This is my favorite way to transfer art onto the final product! The following tools are ones I always have on hand for moments like this:
- Transparent Ruler with Grid
- Tracing Paper
- Carbon Transfer Paper
- White Plastic Eraser
- Pencil (the one depicted is your average #2, but I prefer a Mechanical Pencil)
First, I cut a piece of tracing paper to size and drew out the monstera leaf, making sure the it fit the physical bottle and was centered well. I actually sometimes print out the drawing from my iPad, but instead I gently traced the monstera leaf off the screen of the iPad (sort of like using a light table). Just be careful not to scratch your iPad screen if you’re doing this method! It’s a little trickier, but it saved me some ink and paper.
Then, by taping a piece of carbon paper underneath the design, I was able to trace the leaf design right onto the tumbler. I made sure to draw lightly and not scratch the tumbler surface (though these babies are pretty indestructible). I repeated this step on each bottle, transferring the design, and measuring the placement to ensure the repeat design was as consistent as possible. It all took a little work to transfer the design, but this step is so helpful to see all the bottles with the repeated design together!
Next, I used a pencil to draw in the names overtop with Calligraphy Lettering directly onto the green surface. When I draw out the Lettering, I’m aware of the shape of the letterforms and the flourished swashes, working to achieve beautiful balance and legibility.
Again, it was super helpful to see the fleet of tumblers all lined up — my goal is to make them all look consistent, having the names at a similar angle and with a comparable Hand Lettering style, before I move on to the permanent Hand Engraving part.
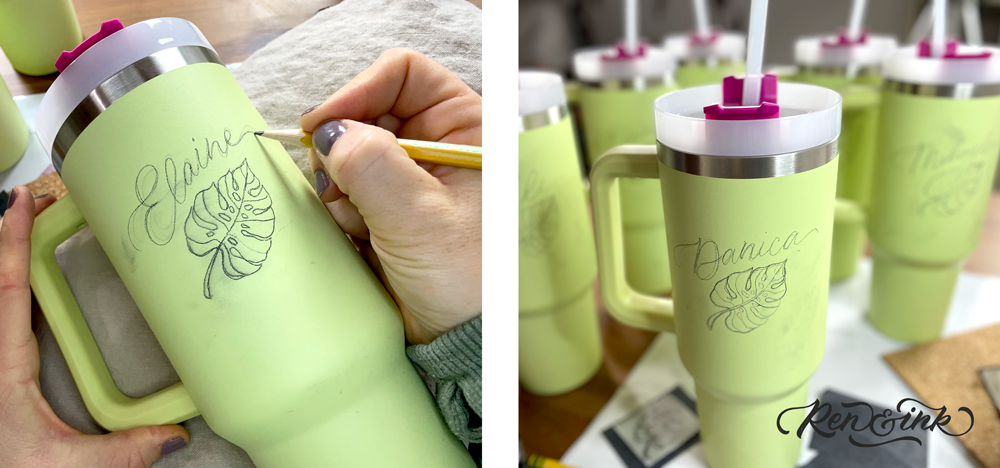
You may have noticed the tumblers appear to be dirty as I go through the transferring process. This is due to the carbon paper and pencil graphite that I use. The dirty smudges wipe away easily at the very end of the project!
🌿 Engraving the Design by Hand
After all the Stanley tumblers have a transferred monstera leaf and names drawn out in beautiful Calligraphy Lettering, I’m ready to gather my supplies to start Hand Engraving the design!
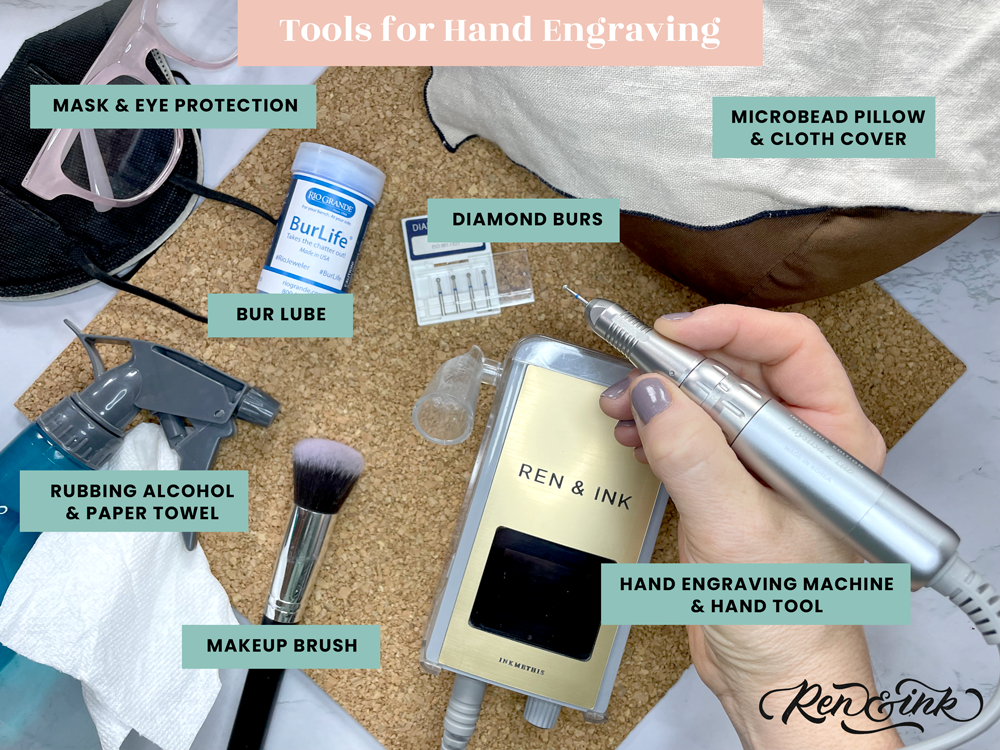
The materials I use for engraving can look overwhelming, but here is the list and a description of each to explain how each one is important to the process:
- Mask & Eye Protection — I personally like using KN95 masks to filter out fine dust from engraving, and I use reading glasses to magnify and see details clearly.
- Microbead Pillow & Cloth Cover — the microbead pillow holds awkward objects in place as I’m engraving, and the cloth is simply a linen napkin I lay overtop to catch dust.
- Diamond Burs — I purchase these from INKMETHIS, and I prefer the BR30M Ball Bur for most projects.
- Bur Lube — this is essential to allow the bur to glide across the surface and prolong the life of the burs. I only specifically purchase Bur Life by Rio Grande because I’ve had serious issues with other brands that have damaged my expensive drill.
- Hand Engraving Machine & Hand Tool — I love my machine from INKMETHIS so much that I purchased two (so I have a backup). The brushless motor doesn’t vibrate, and the RPM goes up to 35,000 for a smoother line.
- Makeup Brush — brushes away fine dust particles during engraving.
- Rubbing Alcohol & Paper Towel — for finishing cleanup of all the dust and carbon bits.
Once I’ve inspected the drawn & transferred pencil line design on all of the bottles, I then set up the first Stanley bottle to be engraved by resting it on a foam bead filled pillow — this allows me to move and position the awkward shape as I etch on the surface.
With my trusty engraver in hand, I dip the diamond bur into the Bur Life wax lube, a very important step to repeat often so the bur glides smoothly.
I then carefully run the bur along the surface to etch a single line over all my drawn pencil lines, moving slowly and with purpose. As dust collects, I’ll brush the surface with my soft makeup brush to keep a clean surface and clear vision of the artwork.
It’s a slow process, but I like to focus and take joy in the hand crafted-ness of it all!
Each bottle takes quite a bit of time engraving each by hand — first with a single etched stroke, then going over certain areas to perfect the curves.
To achieve the Calligraphy Script look in the Lettering, I’ll then add a thicker etched area to all the downstrokes of the letterforms, using short and confident strokes with the rotating bur. It’s a long process that requires concentration, but you’ll see in my video how the addition of thicker downstrokes really brings the Lettering to life!
Check out the video to see how I add thicker downstrokes to my Lettering 👇
Once the etching process has been completed, I clean each bottle carefully with rubbing alcohol and paper towels, being careful to remove any remaining wax from the Bur Life lube and dust. A magic eraser sponge will remove any remaining scuffs and carbon from the pencil lines of my sketch. Lastly, the bottles get a final clean and shine with the rubbing alcohol, and are ready to pack up for the customer!
In addition, I like to include a little bio and my contact information with each individual item — for this particular project, I tucked the slip of paper into the tumbler. Including this shows that the item has been custom hand engraved just for them, but it also markets my business with my contact info. I have received countless repeat customers simply from doing this, as they usually remember my name when they are in need of a unique personalized gift!
This process is similar for all of my projects, even if I’m working with another material, such as glass or other metal. Though the different materials all have their various challenges, the client process from start to finish is consistent because I’ve developed it through many projects.
Though it may seem labor intensive, I prefer to take extra time in the beginning with sketching and having the design approved by the client — if there is any miscommunication, misspelling, or the client has an adjustment after seeing my design, I’d much rather find that out before I’ve etched an expensive product!
What Products Can Be Hand Engraved for Customers? 🤔
This particular project was exciting to work with, but there are many items I’ve custom etched for clients, adding beautiful Hand Lettering and designs that have personal meaning and significance.
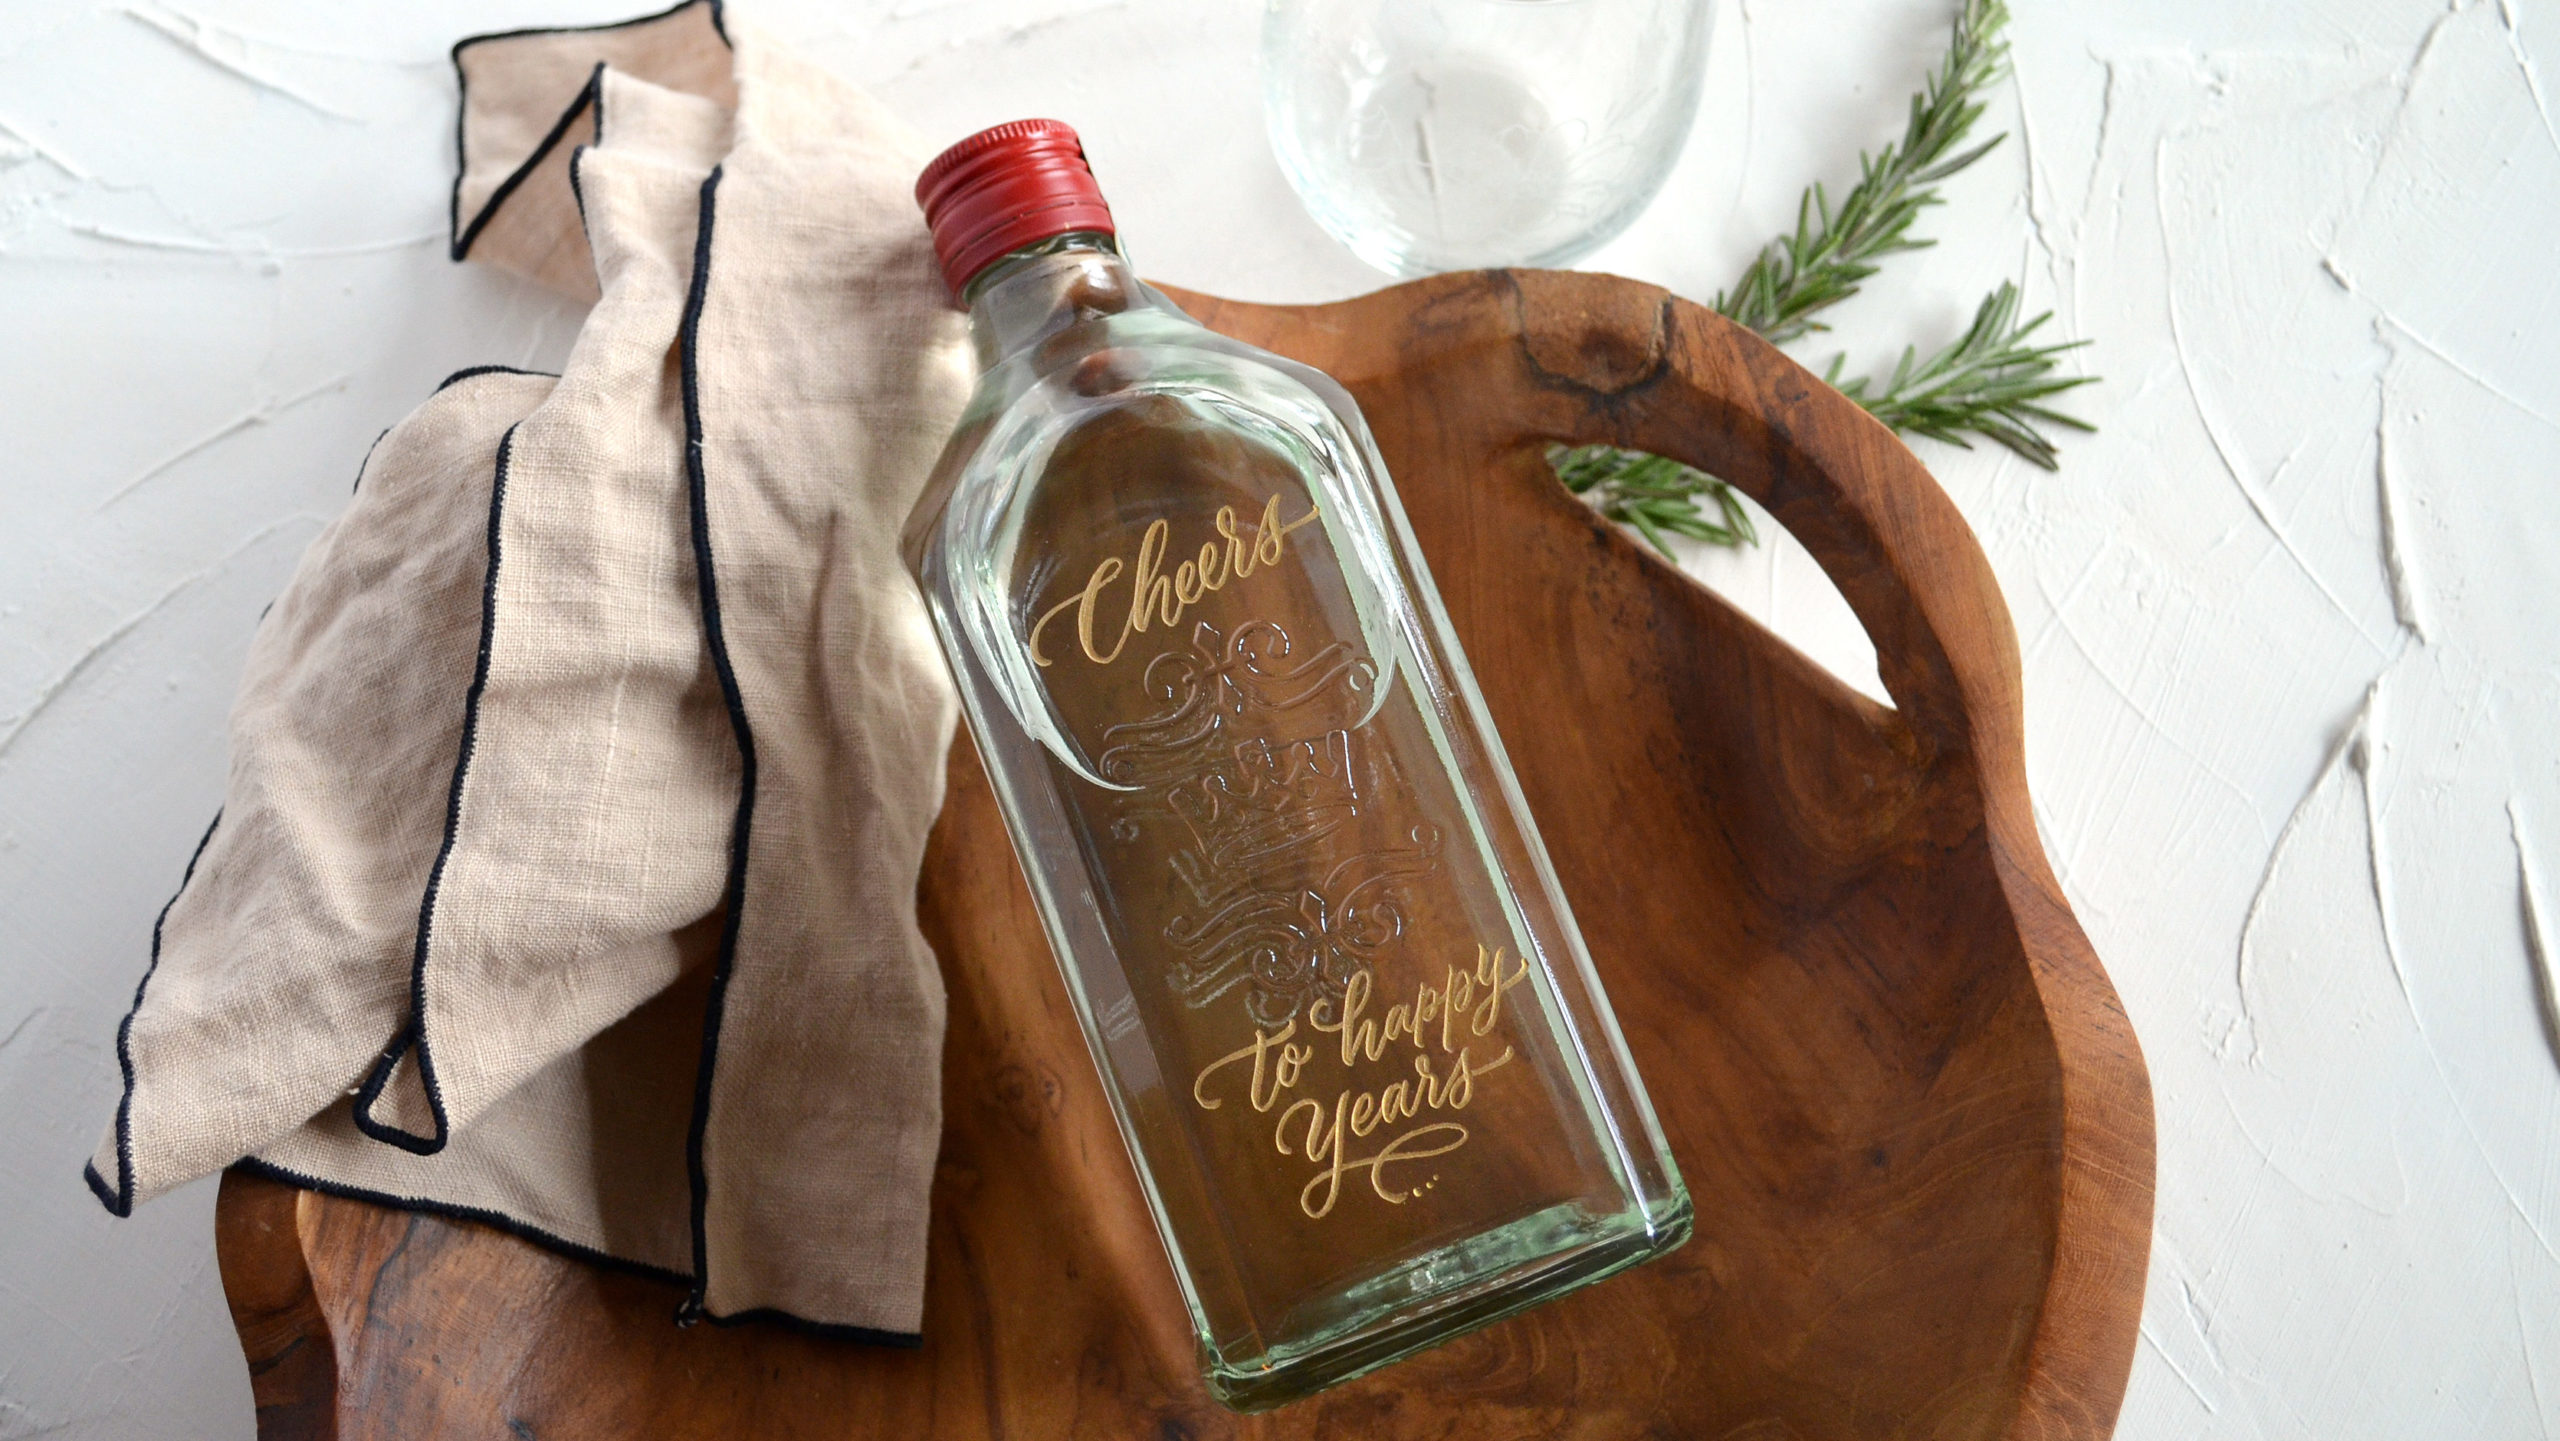
The items I find are most popular are wine or liquor bottles, glassware, fragrance bottles, stainless steel water bottles, makeup containers, and candle jars — however, that’s just the beginning!
Some favorite projects that I’ve custom engraved for Clients:
- Champagne flutes for wedding guests
- Yeti bottles or other stainless steel bottles, with nicknames, floral elements, names of boats, or other special messages
- Vintage glassware with various florals for bridal party
- Toasting glasses for Anniversaries and bridal couples, some with really cute nicknames or with a special date added
- Personalized vintage metal ornaments
- Yeti dog bowls and dog tags with adorable pet names
- Whiskey bottles or other top shelf liquor bottles with special messages, usually for a men’s gift or retirement
- Commemorative bookmarks for graduations or special book loving friends
- Perfume and cologne bottles for members of a wedding party
When a customer requests a new object I’ve never attempted to etch, I recommend testing a sample item or trying out a small etched line in an inconspicuous spot. Sometimes adjusting the speed on my engraving machine to lower than 35,000 RPMs could work better on a new surface, but I’d need to test out that theory before committing to the engraved design. A conversation with the client is important to have before saying “yes!” to the custom project.
Final Thoughts ✨
Custom projects for clients involving Hand Engraved Calligraphy and Hand Engraved Florals and designs are some of the most rewarding work I’ve done! I absolutely love working with a client to create a unique and meaningful project that often gets gifted to a very deserving person.
When a person enjoys my art and trusts me enough to custom Engrave something for them, I think of it as the highest honor. Thank you to all my past customers, and a special thanks to the client that allowed me to share the process of Hand Engraving these Stanley tumblers!


